
Home
Home
Services
Services
Resources
Resources
Storm Restoration
Storm Restoration
Roof Systems
Roof Systems
Locations
Locations
February 12, 2026
Get clear steps for the roof replacement process insurance requires, from documenting damage to working with your contractor and filing your claim confidently.
Guides
Let’s be honest: the roofing and insurance industries don’t always have the best reputation for clarity. Homeowners are often caught between high-pressure sales tactics from roofers and confusing jargon from insurance adjusters. It’s easy to feel like you’re at a disadvantage. This guide cuts through the noise. We believe homeowners deserve facts, not fear. Here, you’ll find a transparent, step-by-step breakdown of how to handle your claim with confidence. We’ll show you how to build a case based on solid evidence, not opinions. By demystifying the roof replacement process insurance providers follow, we put you back in control of the decisions affecting your home.
Understanding your homeowners insurance policy is the first step in a successful roof claim. It’s designed to protect your home from sudden, unexpected events, but it’s not a maintenance plan. Knowing what is and isn’t covered can save you a lot of time and frustration down the road. The coverage often comes down to the cause of the damage, the condition of your roof before the event, and its age.
Most standard homeowners insurance policies are there to help you recover from damage caused by specific events, often called "perils." Think of things you can't control, like severe weather. In Houston, this typically includes damage from wind, hail, and hurricanes. A standard policy also covers roof damage from events like fallen trees or fire. If a sudden storm rips off shingles or a tree branch crashes through your roof, your insurance is designed to step in. This is the core purpose of your coverage: to restore your roof after an unforeseen accident or "act of God."
Insurance policies almost always exclude issues that result from a lack of maintenance. Normal wear and tear is not covered, which means you can't file a claim just because your shingles are old and worn out. Damage that happens over time, like slow leaks or deterioration from sun exposure, is considered your responsibility to maintain. Similarly, damage from termites and other pests is generally not covered because it’s seen as a maintenance issue. An insurer’s view is that these problems could have been prevented with regular upkeep and inspections.
The age and condition of your roof are critical factors in any insurance claim. Even if a hurricane causes clear damage, an insurer might deny your claim if your roof was already old or in poor condition. They may argue the damage is due to pre-existing wear and tear, not just the storm. Some policies also change how they pay for an older roof, offering only its depreciated value instead of the full replacement cost. This is why having a clear, professional roof inspection that documents your roof's condition before you file is so important. It provides a factual baseline to support your claim.
When you discover roof damage, your first instinct might be to call your insurance company immediately. But taking a moment to prepare can make a significant difference in how smoothly your claim process goes. Acting with a clear strategy, rather than reacting in a panic, puts you in control. By gathering the right information and evidence upfront, you build a strong, fact-based case for your claim. These initial steps are about creating a clear record of the damage and understanding your position before you even start the official process. This preparation helps ensure you have everything you need to work effectively with your insurer and your roofing contractor, turning a stressful situation into a manageable project.
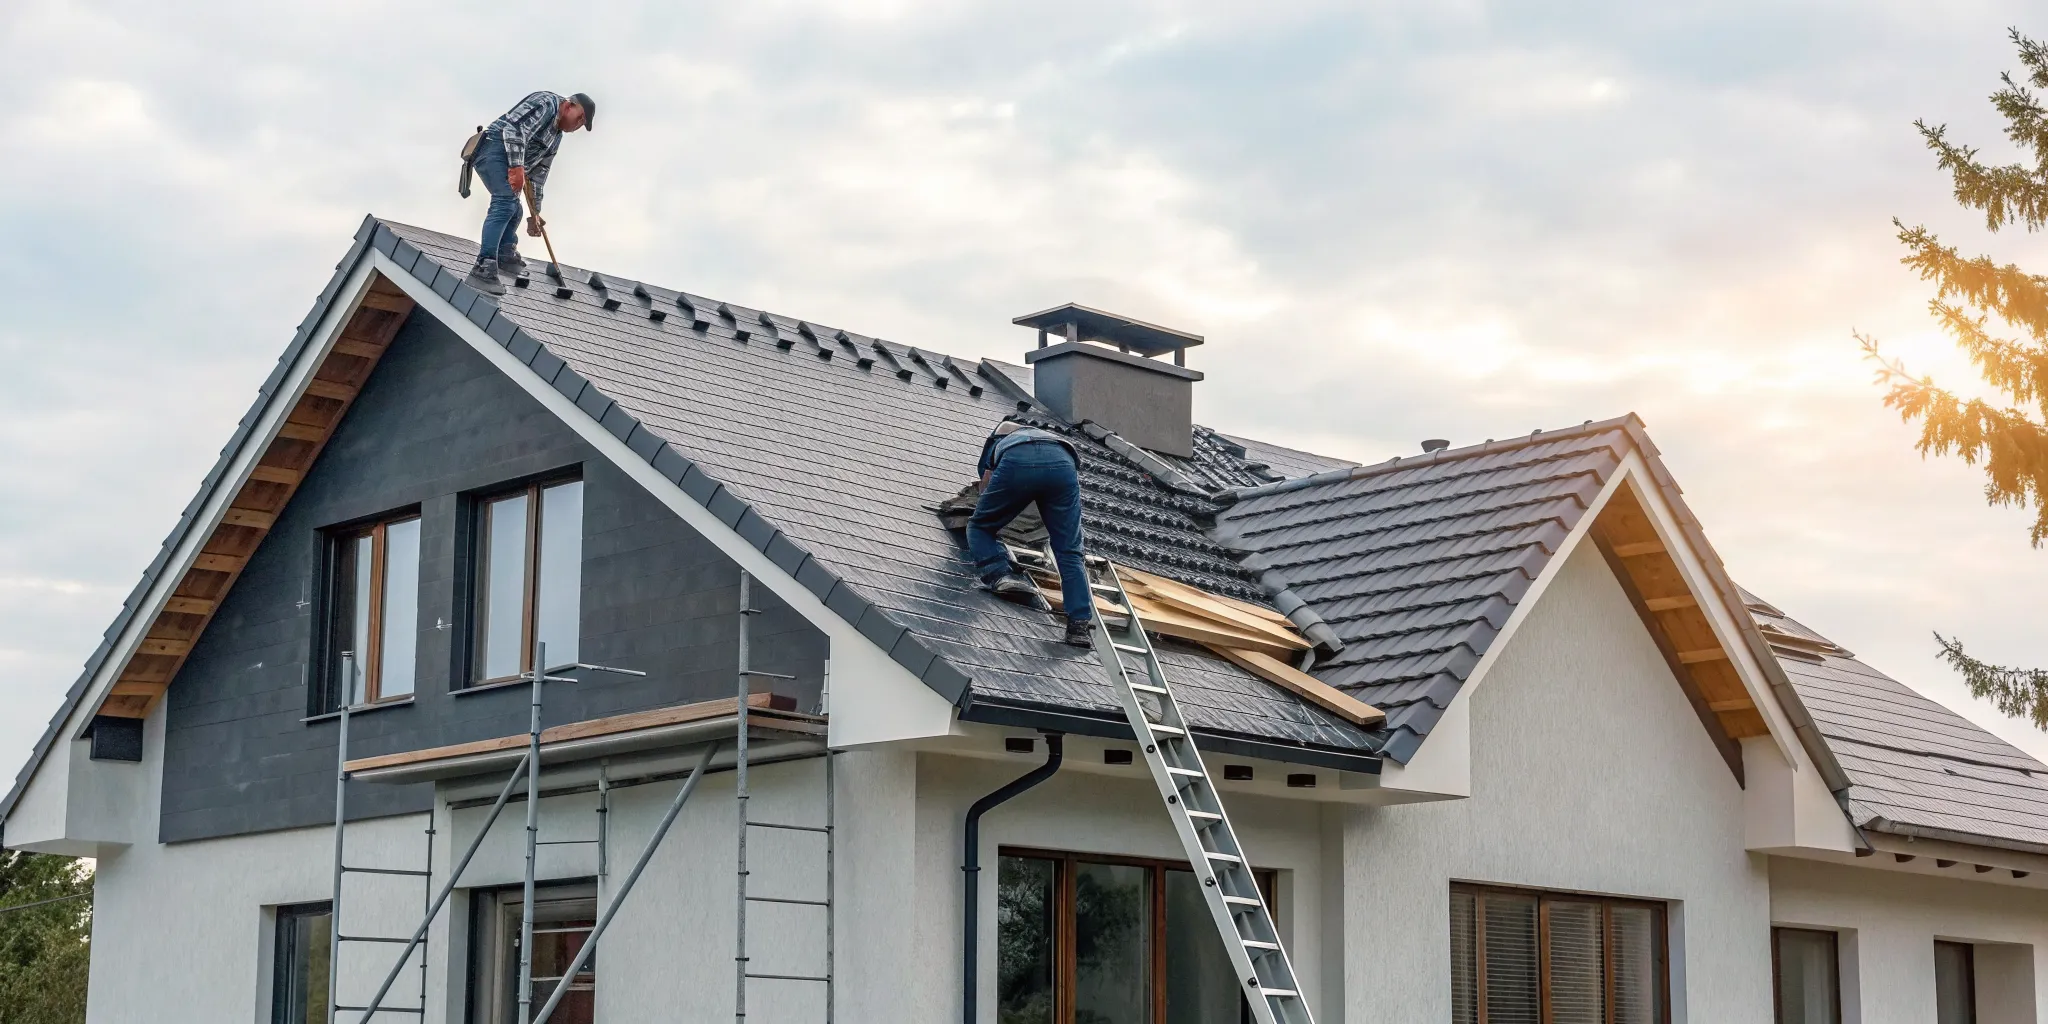
Before you do anything else, grab your phone and start documenting. Take extensive photos and videos of the damage from every possible angle. Get close-ups of dented shingles, missing granules, and any visible punctures. Then, take wider shots to show the context of the damage across entire sections of your roof. Don’t forget to photograph any interior damage, like water stains on your ceiling. This visual evidence is your most powerful tool. It creates a timestamped record of your roof's condition right after the event, which is crucial for proving your claim. You can’t take too many pictures, so be thorough. This documentation will be invaluable when the insurance adjuster visits.
While your photos are essential, a professional assessment provides the technical details your insurance company needs. Before filing, have a reputable roofing contractor perform a detailed inspection. An experienced professional can identify damage that isn't obvious from the ground, like hail impacts or wind-lifted shingles that have broken their seals. They will provide a comprehensive report, complete with their own photos and an expert opinion on whether the damage warrants a claim. This step helps you avoid filing a claim for minor issues that fall below your deductible, which could needlessly affect your policy. It also gives you a trusted partner who can help you understand the scope of repairs from the very beginning.
Insurance policies can feel complicated, but you need to understand your coverage before you file. Pull out your policy documents or log into your provider’s online portal and find the section on roofing. Look for specifics on what types of damage are covered, such as wind and hail. It’s also important to know your deductible, which is the amount you’ll have to pay out of pocket. Pay close attention to whether your policy covers the full Replacement Cost Value (RCV) or only the Actual Cash Value (ACV), which accounts for depreciation. Finally, check the timeline for filing a claim, as most policies have a deadline. A quick review of your policy ensures there are no surprises later on.
Once you have your photos, inspection report, and policy details, it’s time to organize your paperwork. If you had to make any temporary repairs to prevent further damage, like placing a tarp over a leak, keep the receipts. These costs are often reimbursable as part of your claim. Your roofing contractor should also provide a detailed, line-item estimate for the necessary repairs or replacement. This estimate will be a key document you submit to your insurance company. Keeping all of these documents together in one place, whether in a physical folder or a digital one, will make the filing process much more efficient and show your insurer that you are organized and serious about your claim.
Once you have a professional inspection report and your own documentation in hand, you’re ready to start the claims process. Filing an insurance claim can feel intimidating, but it’s a straightforward process when you break it down into manageable steps. Think of it less as a confrontation and more as a business transaction. Your goal is to provide your insurance company with clear, undeniable proof of the damage so they can fulfill their end of the policy agreement. Being organized and proactive from the start will make a significant difference in how smoothly everything goes.
The work you did documenting the damage and getting a professional, data-driven inspection is the foundation of your entire claim. This preparation shifts the conversation from opinion to fact, which is exactly where you want it to be. It shows your insurer that you are a serious, informed homeowner who has done their due diligence. This section will walk you through the key actions you need to take to file your claim effectively. With the right preparation and a clear understanding of the steps involved, you can confidently manage the process and work toward a fair and timely resolution for your roof repairs.
The first thing you need to do is notify your insurance company about the damage. Most policies require you to report a claim within a certain timeframe, so don’t delay this step. When you call, have your policy number and the date the damage occurred ready. Briefly explain the situation and reference the professional inspection you had done. Your insurer will assign you a claim number and an adjuster. This initial call gets the ball rolling, but keep in mind it can take a week or two for the adjuster's visit to be scheduled, which is why it’s so important to act quickly and get your claim in the queue.
After your initial call, you’ll need to formally submit your evidence. This is where your detailed records become essential. Send your insurance company the photos and videos you took, along with a copy of the professional inspection report from your roofer. This report provides a data-driven assessment that clearly outlines the scope of the damage. Remember to keep all invoices and receipts for any temporary repairs, materials, or labor. Your insurance company will likely request these documents to verify your expenses. Keeping everything in a single digital folder makes it easy to find and share information as needed.
The insurance adjuster’s job is to assess the damage and determine the value of your claim on behalf of the insurer. It is crucial that you or another responsible adult are home to meet them. Being present allows you to walk them through the property, point out specific areas of concern noted in your inspection report, and answer any questions they might have. This ensures nothing is overlooked. An in-person meeting helps build a direct line of communication and shows you are actively involved in the process. It’s your opportunity to make sure the adjuster sees exactly what you and your contractor have documented.
Your roofing contractor is your most valuable partner during the claims process. A roofer who is experienced with insurance claims can provide critical support. Ask your contractor to be present during the adjuster’s inspection. They can speak the same technical language as the adjuster, point out specific types of damage, and ensure the proposed scope of work is accurate and complete. Your contractor can also perform necessary temporary repairs to prevent further water damage while you wait for the claim to be processed. Just be sure to keep every receipt for these costs, as they are often reimbursable.
Once you've filed your claim, the process moves into the hands of your insurance company. It can feel a bit like a waiting game, but knowing the key steps makes it much smoother. Here’s a breakdown of what happens next, from the adjuster’s visit to the final payment. Having a clear roadmap helps you stay in control and ensures you’re prepared for each stage. This is where your partnership with a trusted roofer becomes invaluable, as they can help you manage the details and communicate effectively with your insurer.
After you file, your insurance company will assign an adjuster to your claim. This person’s job is to visit your home and conduct their own inspection to verify the damage. It typically takes one to two weeks to get this visit scheduled. We strongly recommend that your roofing contractor is present for this meeting. Having your roofer there ensures a professional advocate is representing your interests. They can point out specific damage the adjuster might overlook and answer technical questions on the spot, making sure the assessment is as accurate and thorough as possible.
Following the adjuster’s inspection, your roofing company will submit a detailed estimate and a scope of work to the insurance company. This document outlines all the necessary repairs and their associated costs. Once the insurer reviews and approves the claim, you’ll typically receive your first check within one to two weeks. This initial payment is often called the Actual Cash Value (ACV) payment. It’s not the full settlement amount but is intended as a down payment to help you get the repair process started with your contractor.
Understanding your policy type is critical to knowing how you’ll be paid. Most homeowner’s policies are either Actual Cash Value (ACV) or Replacement Cost Value (RCV). An ACV policy pays for the current value of your damaged roof, factoring in depreciation for its age and wear. An RCV policy, which is more common, covers the full cost of replacing your roof with new, similar materials. The key difference is that an RCV policy provides the funds to make you whole again, while an ACV policy leaves you to cover the depreciation gap. You can learn more about the difference between ACV and RCV from the Insurance Information Institute.
If you have an RCV policy, your insurance company will initially pay the actual cash value (the roof’s depreciated worth). The remaining amount, known as the recoverable depreciation, is paid after the work is completed and you’ve submitted the final invoice from your contractor. Sometimes, your roofer may uncover hidden damage once they begin repairs. In these cases, they will file a supplemental claim for the extra costs. Your insurer will review the new damage and, if approved, issue another payment. It’s also important to know that if your roof is very old, an insurer might deny the claim, arguing the damage is from normal wear and tear, not a specific event.
The insurance claim process can feel like a maze, but knowing what not to do is just as important as knowing what to do. A few common missteps can delay your claim, reduce your payout, or even lead to a denial. By avoiding these pitfalls, you can approach the process with confidence and ensure you get the fair settlement you deserve for your home. Here are the key mistakes to steer clear of.
After a storm, it’s easy to put a roof inspection on the back burner, but waiting is one of the biggest mistakes you can make. Every insurance policy has a strict deadline for filing a claim, sometimes called a "statute of limitations." If you miss this window, your claim will likely be denied, regardless of the damage. Check your policy documents right away to understand your specific timeline. Delaying also gives minor issues, like a few missing shingles, time to become major problems like leaks and water damage. Acting quickly shows your insurer you’re serious about protecting your property and helps get the repair process started before things get worse.
When the insurance adjuster presents their initial settlement offer, it can be tempting to accept it and move on. However, this first offer is often just a starting point. It’s based on a brief inspection and may not account for the full scope of damage, especially issues that aren't immediately visible. This is why having a detailed, independent inspection report from a trusted roofer is so valuable. You can use it to compare against the adjuster’s assessment. If the offer seems low, don’t be afraid to have a factual conversation with the adjuster, provide your documentation, and advocate for the true cost of repairs.
If a roofing contractor offers to waive or cover your insurance deductible, you should see it as a major red flag. While it sounds like a great deal, this practice is a common sign of insurance fraud. To make up the difference, the contractor often has to submit an inflated invoice to your insurance company, which is illegal and can put you in a difficult position. Your deductible is your responsibility as part of the insurance agreement. Working with an honest contractor who is transparent about costs ensures the process is handled ethically and protects you from getting involved in a fraudulent scheme. Always choose a roofer who prioritizes integrity over tempting but risky shortcuts.
When you speak with your insurance adjuster, your words carry a lot of weight. It’s crucial to be honest, but you should avoid speculating or accidentally hurting your own claim. For example, never say something like, “My roof was old anyway.” This can give the insurer a reason to attribute the damage to age or wear and tear instead of the recent storm. Stick to the facts you know. Describe the date of the storm and the damage you can see. Let your professional roof inspection report provide the expert analysis and details. Clear, factual communication is your best tool for a smooth and successful claim.
Filing an insurance claim can feel like a full-time job, but a few key strategies can make the process smoother and help you secure a fair outcome. It’s all about being prepared, staying organized, and working with the right people. When you approach your claim with confidence and clear documentation, you put yourself in the best position to get your roof repaired correctly and without unnecessary stress. These steps will help you manage the process effectively from start to finish.
Partnering with a roofing contractor who has deep experience with insurance claims is one of the most important decisions you’ll make. This professional is more than just a roofer; they are your advocate. They know how to document damage in a way that insurance adjusters understand and can spot issues that might otherwise be overlooked. A seasoned contractor can review your adjuster’s report to ensure the scope of work is accurate and that nothing has been missed. When you choose a contractor, look for one with strong local reviews and industry certifications. They can make a significant difference in ensuring your claim covers all necessary repairs.
From your very first call to your insurance company, start documenting everything. Keep a dedicated notebook or digital file to log every conversation, including the date, time, and the name of the person you spoke with. Make notes on what was discussed. After a phone call, it’s a great practice to send a brief follow-up email summarizing the conversation. This creates a written record and confirms that everyone is on the same page. This paper trail is invaluable if any confusion or disputes arise later. Staying organized with your photos, inspection reports, and communications will give you a solid foundation for your claim.
Your insurance policy is a contract, and understanding its terms is key to a successful claim. Take some time to review your policy documents, paying close attention to your deductible, your coverage limits, and whether you have a Replacement Cost Value (RCV) or Actual Cash Value (ACV) policy. Also, check for any deadlines on how long you have to file a claim after the damage occurs. Knowing these details helps you set realistic expectations and have more productive conversations with your insurance agent. Understanding the steps of the roofing insurance process ahead of time will prepare you for what’s to come and help you feel more in control.
Receiving a denial letter can be disheartening, but it doesn’t have to be the final answer. Your first step is to ask the insurance company for a detailed explanation of the denial in writing. Sometimes, claims are denied due to missing information or a simple misunderstanding. Once you understand the reason, you can determine your next steps. You can provide additional documentation, get a second opinion from an independent inspector, or ask your contractor to review the adjuster’s findings. If you believe the denial is unfair, don’t hesitate to reach out for professional assistance to understand your options for an appeal.
Why should I get a roofer's inspection before calling my insurance company? Getting a professional inspection first puts you in control of the process. It provides you with a detailed, data-backed report on the condition of your roof. This helps you understand the true extent of the damage and decide if it's significant enough to warrant a claim, potentially saving you from filing for minor issues that fall below your deductible. When you do file, you're not just reporting a problem; you're presenting a case supported by expert evidence from the very beginning.
What happens if my roofer's estimate is higher than the insurance adjuster's? This is a very common situation, so don't panic. An adjuster's initial estimate is often based on a quick assessment and standard pricing. A professional roofer's estimate is based on a thorough inspection and the specific materials and labor required for a quality job. If there's a difference, your experienced contractor will provide their detailed report and photos to the adjuster to justify the costs and ensure the settlement covers all necessary work.
Will filing a claim for storm damage cause my insurance premium to increase? Generally, insurance companies are prohibited from raising your individual premium for filing a single claim related to a storm or other "act of God." These events are considered outside of your control. However, if a major storm causes widespread damage in your entire area, the insurer might raise rates for everyone in that region to cover the significant losses. Your personal claim is not the direct cause, but rather part of a larger event.
Can you explain the difference between RCV and ACV in simple terms? Think of it like this: Replacement Cost Value (RCV) is the policy that gives you the money to buy a brand new, equivalent roof at today's prices. Actual Cash Value (ACV) gives you the money for what your old roof was actually worth at the moment it was damaged, factoring in its age and wear. An RCV policy is designed to make you whole again, while an ACV policy will require you to pay the difference between your roof's depreciated value and the cost of a new one.
What is my role after the adjuster's visit? After the adjuster inspects your roof, your main job is to stay organized and in communication with your roofer. You will receive a report from the adjuster detailing the approved scope of work and the initial payment. Review this document carefully with your contractor to make sure nothing was missed. From there, your roofer will handle scheduling the work and submitting the final invoice to the insurance company to release the remaining funds. Your role is to be the informed decision-maker, not the project manager.
Roofing Resources


